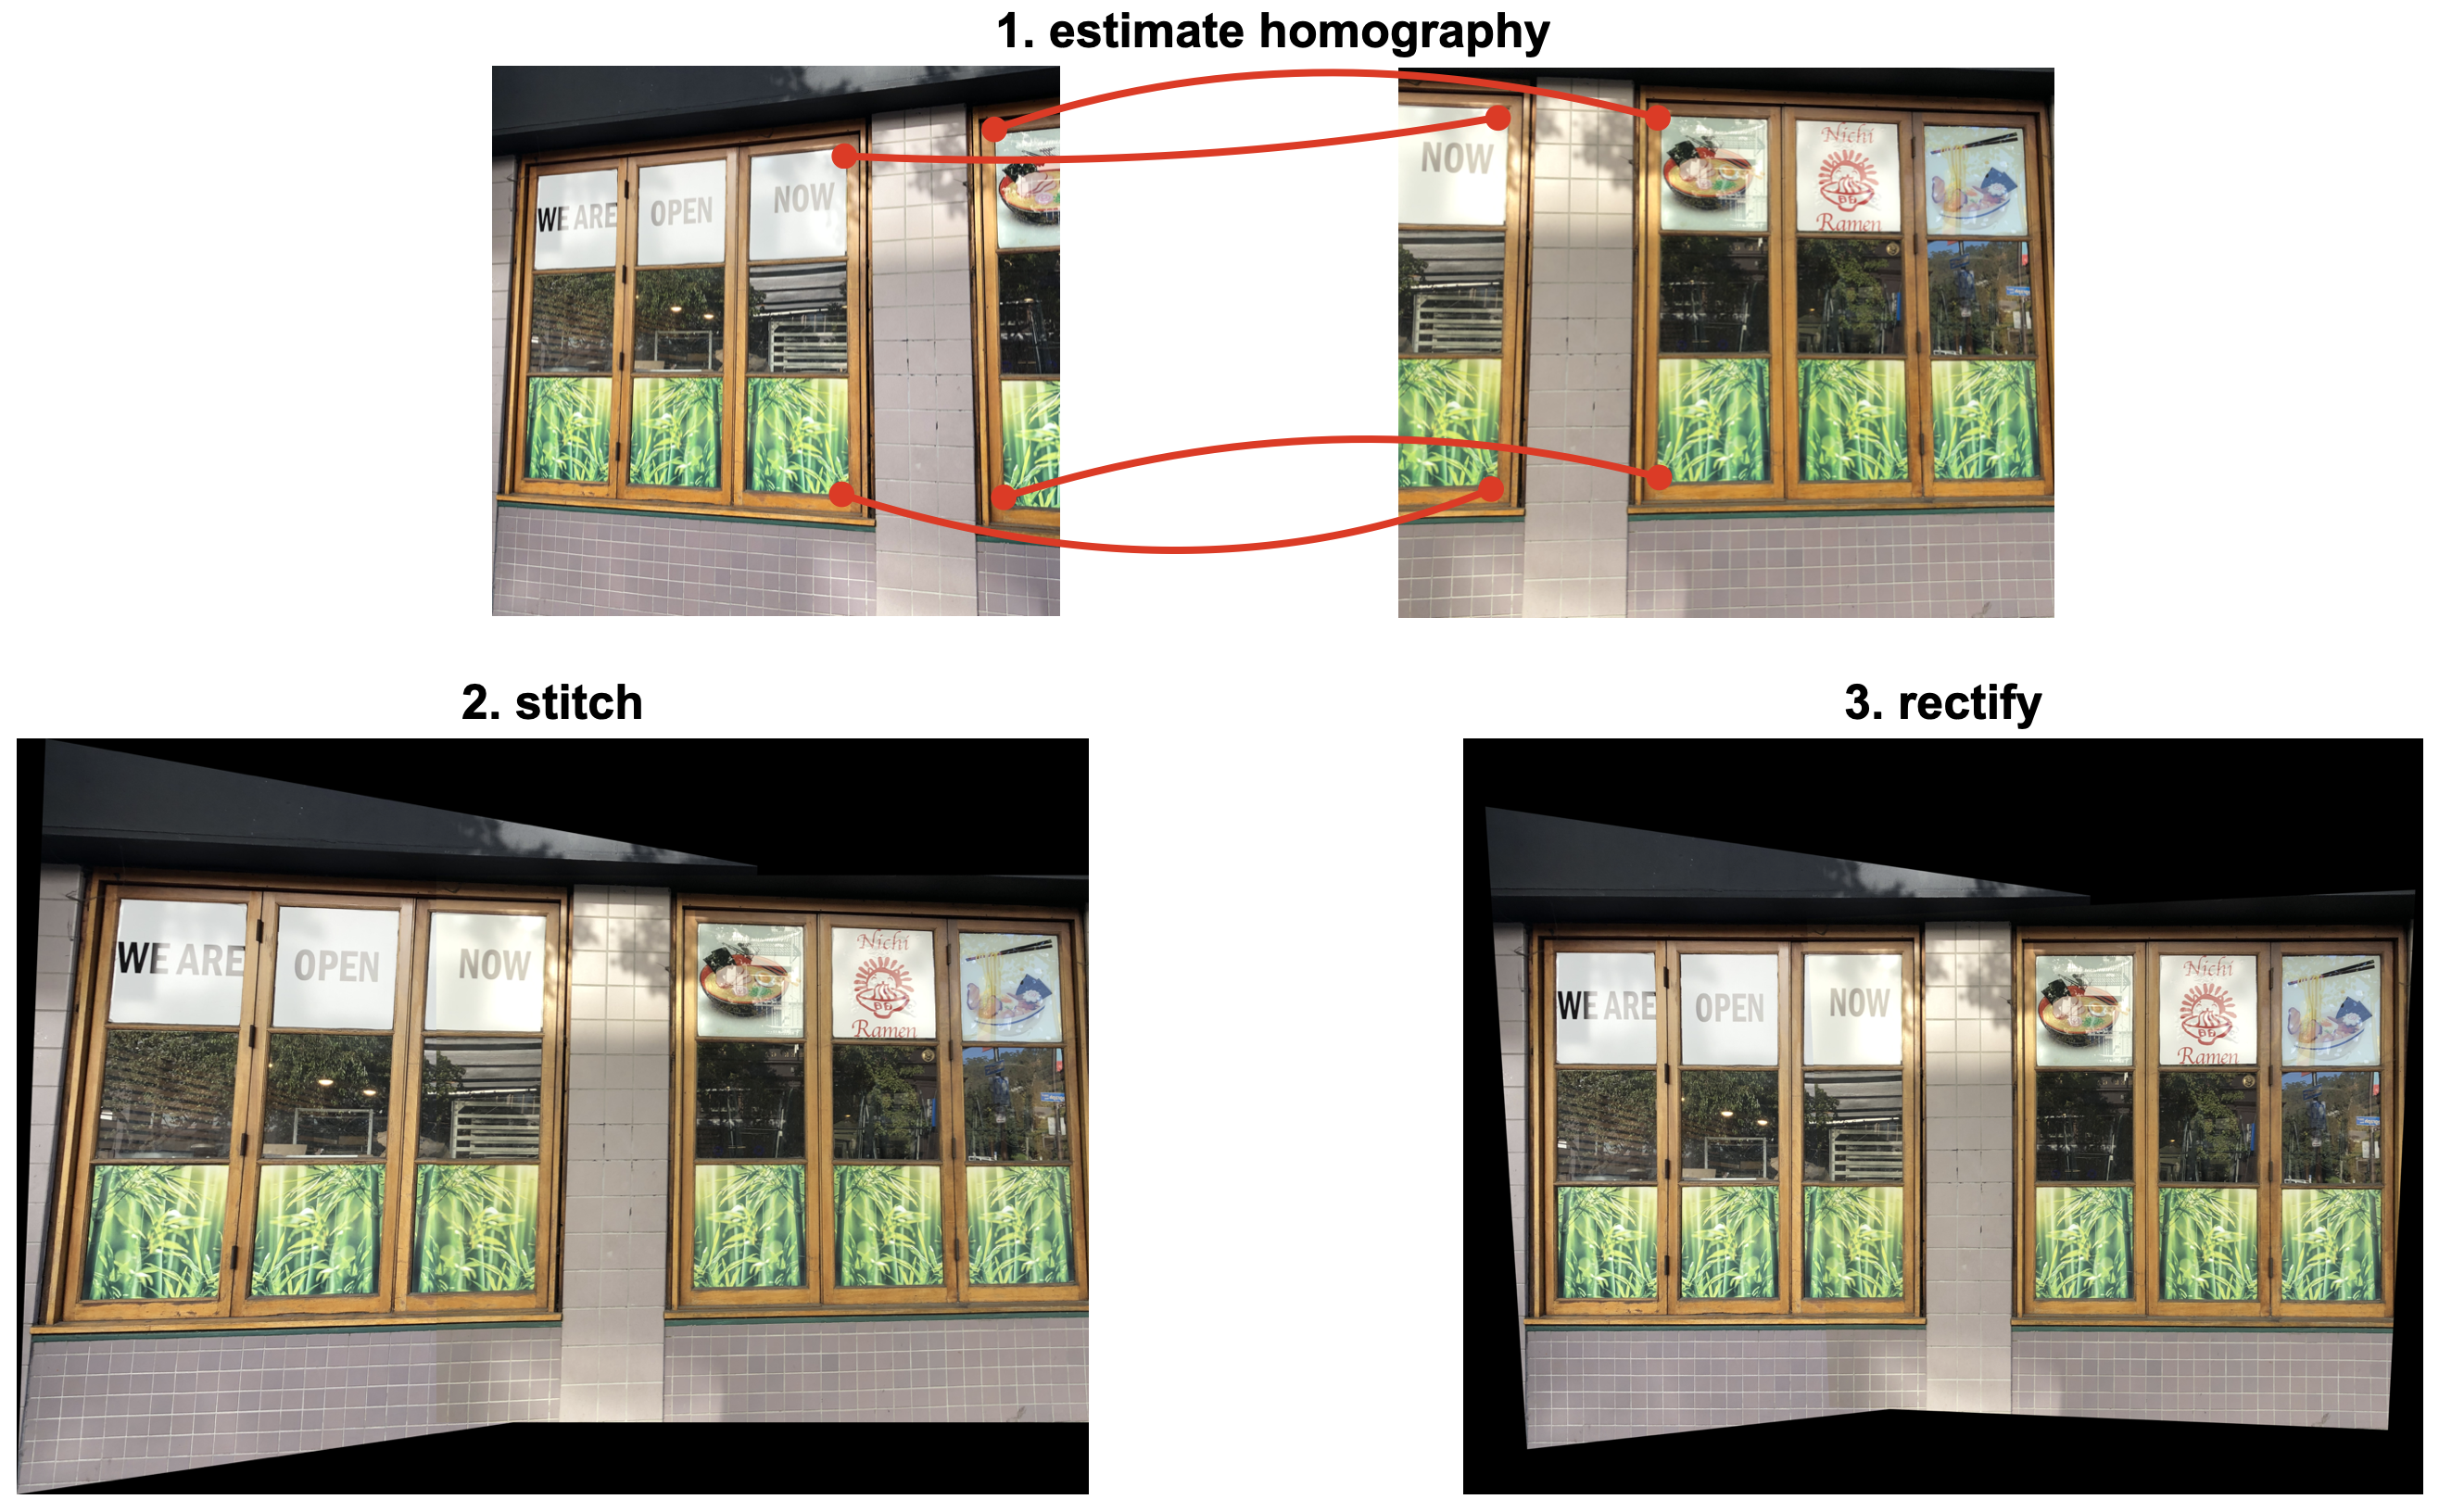
Given two images of a planar surface, you will align one image (source) to the other (destination) and then rectify the stitched image to remove any perspective disortion.
We will provide some code to get you started. You will fill in the missing pieces in this code. There are five basic steps to be completed.
- Homography: Write a Python function find_homography that takes as input two images (source and destination) and computes the homography from the source to the destination. You can use OpenCV's findHomography. The homography calculation requires at least four point correspondences. We have provided a set of four hard-coded point correspondences in the code, but you can also try to add more points to make the homography estimation more robust.
- Bounds: The stitched image should be large enough to contain both the transformed source and destination image. Therevore, we need to first compute the size of the final stitched image. For this, you will use the corners of the source and destination images (i.e., [0, 0, im.shape[1], im.shape[0]] to find the bounds for the final image. Warp the the source corners using the estimated homography from step 1, and combine with the destination corners to compute the final bounds. You can use OpenCV's perspectiveTransform to warp the source bounds. (Hint: The final image bounds can have negative values, which means that the source image, after warping, will lie above and/or left of the (0,0) position in the destination image.)
- Warp: In order to stitch the source and destination images, you need to first warp the source to the destimage image. Use the provided warp_image_with_bounds. The function expects the source image, homography, and the final image bounds computed in step 2. The output of this function will be large enough to contain both the source and destination images. However, this output will only contain the source image warped to the destination space and translated so that the left-top of the source image is at (0,0).
- Stitch: Place the destination image into the result from step 3. You will need to shift the destination image by the appropriate amount before placing it in the output image. You can simply replace the pixel values of the output image with destination image (i.e., we are not performing any blending at the image seam).
- Rectify: Finally, rectify the stitched image so as to remove any perpsective distortion. You can assune that each of the three-panelled large windows are square. Use the four corners of the window in the stitched image and transform it to the destination points provided in the supplied code (make sure to specify your points in the same order. Display the final stitched and rectified image.
Your solution must follow the structure of the code provided above; your parts are specified by the comment # YOUR CODE HERE:....